DJ-1282 Wrist Pin GX200/Clone / Pred
Shop All Categories
800-521-3560
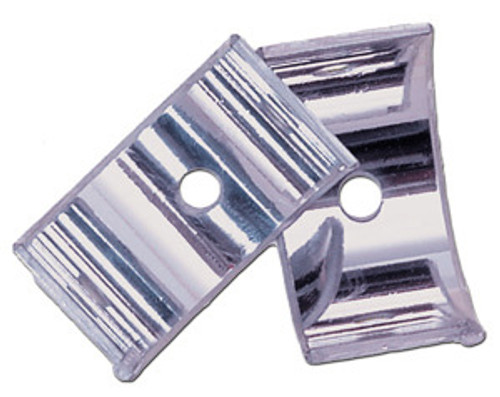
ARC stock length billet rod with bearing inserts for the GX200/Clone engines. 100% Percent made in the USA, including rod, bearings, bolts and washers.
Predator 212 Ghost / Predator 224 Requries .709'' wrist pin piston
3.303" center-to-center for a 1.180" Honda/Clone crank journal and .709" wrist pin. For use with the OEM stock crankshaft and stock style (dished or flat top) piston in modified engines. Uses ARC's custom manufactured bearing inserts and ARP rod bolts manufactured specifically for ARC. Our rods have the only forced oiling scoop dipper available for these engines providing superior lubrication at the bearing journal.
Rod bolt torque: 170 in/lbs lubricated
***Will Not fit the Hemi or Non Hemi Predator 212cc cranks***
Also available in longer lengths to bring the piston up closer to the top of the deck without machining the block. +.010 (#6269) and +.020 (#6271) Also stock replacement for the Kohler CH270.
Installation Instructions:
To install your ARC rod you will need a 12 point 1/4" socket and a QUALITY inch pound torque wrench. You will need an outside micrometer, dial bore gauge or plasti gauge, and motor oil.
Measure the crank pin diameter with the outside mic, it should measure 1.180-1.1795". Measure in several different spots to insure roundness. If the crank journal is larger than 1.180" the journal should be polished down to size. If the journal is out of round more than .0005" it probably should be replaced. The crank pin finish should be smooth to the touch.
When disassembling the rod notice on the side of the rod with the part number there are two dots next to the separation point of the beam and cap (some older rods don't have the dots). These dots help to re-orientate the cap and beam when assembled. The side of the rod with the part number engraved will always face the side cover, and all oiling holes in the rod will face the cam.
Make sure the bearing and rod serrations are clean. Install the bearings by lining up the tangs on the bearing with the cut outs on the rod. Lubricate the rod bolt threads with oil and hand tighten the bolts. Using the torque wrench and 12 point 1/4" socket tighten the bolts to 60" Inch/lbs. Alternate each side to increase the torque by 20" lbs at a time until you reach 150" Inch/lbs. This helps seat the rod bearing especially on a new rod. Measure the bore with your dial bore gauge opposite the parting lines. If using plasti gauge you will have to install the rod on the crank and use in accordance the plasti gauge instructions.
The rod bore should measure 1.183 +/.0005". With plasti gauge you are looking for about .003" total oil clearance. From .0025-.0035" clearance is acceptable. Anything outside that dimension please call 800-521-3560 for recommendation.
Once clearance is set apply straight motor oil to rod bolts, bearings, crank journal, and wrist pin. Then install.
Do Not use sticky automotive assembly lube, use the oil you plan on running in the engine for assembly lube for all internal parts.
Final torque should be 170" Inch/lbs.
Improperly torqueing rod bolts is one of the most common causes of rod failure.
Refer to instructions shipped with all rods and the video below for more detailed instructions.


(3)

(3)


